|
|
|
|
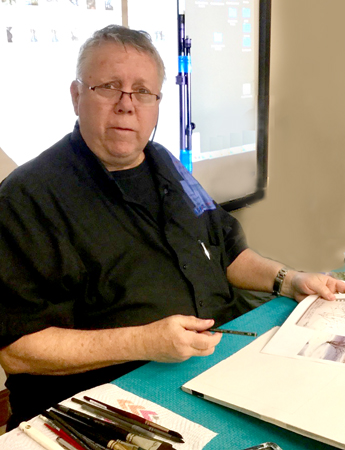
David Rankin
Watercolor Workshop
Coolest Watercolor Techniques
More Essential Training
Euclid Art Association
Friday,
June 1, 2018 through Sunday, June 3, 2018 |
Friday
Evening, June 1st
Friday evening's session began with a discussion of the skills and
techniques needed in order to master some of the coolest
watercolor techniques.
 |
 |
 |
 |
 |
|
"What is a
bead?" David explains, and shows us how to use one |
A kissed-edge
blend - the most difficult of blending procedures |
The bead is
extremely important |
David continues
to show us the blend, using different colors to see what
happens |
Purple, where
the red and blue blend together |
 |
 |
 |
|
Showing us a
broken stroke, and kissed-edge blend |
An example of
the blends we learned on Friday evening |
Broken stroke
using the 1-inch Quiller wash brush, at bottom right |
 |
 |
 |
 |
|
Now the class
tries it |
More class
practice |
David critiques
student work and offers suggestions for improvement |
What happens
when the bead is too thick. We learned to control both a
thick and thin bead |
Examples of student work...
Saturday, June 2nd
David began the Saturday class with a discussion of "magical"
blends done in one initial brushwork. He discussed the steps
in
building a painting, identifying the lightest, brightest, whitest
areas first, and using gravity to help create smooth transitions
when using the kissed-edge blend. Step by step he developed
a landscape painting, and using the 'drag and lift' stroke,
added the final touch, a pine tree. We added a glisten to
the stream, and reflections for the tree.
 |
 |
 |
 |
|
Magical blends
done in 'one' initial brushwork. It took David 3 hours to do
just the head of "Kingfisher" |
How you build a
painting is important. First, identify the lightest,
brightest, whitest areas |
David used
gravity to paint a blue sky on dry paper, kissing the blue
edge with water half way down. He dried the painting, then
added a gray-green mountain using a broken stroke, formed a
bead, and kissed the edge with permanent rose to the horizon |
David's demo of
the foreground using the same kissed-edge technique,
blending paint on the paper. Make it darker as you come
forward |
 |
 |
 |
 |
|
David reviews
what he just did before he sends us off to try it! |
This is David's
painting so far... |
We watch David
paint the other side - a nice review for us |
Deciding what to
do next... |
 |
 |
 |
|
Now for the pine
tree! That took the rest of Saturday afternoon. David did a
demo, then we tried it. David worked with each of us |
Those pine
trees! David makes it look so easy. Remember the 'drag and
lift' stroke |
Adding a
reflection to the stream. Add a glisten, leave 1/8 inch
border on each edge, add shadow reflection, matching the
tree above by tapping Paynes Gray on the edge and letting it
bleed down into the wet glisten. |
Sunday, June 3rd
|
Our Sunday
session began with a quick sketch by David, demonstrating
sketchbook techniques. Then we set to work adding the
finishing touches to our landscape painting. For the
afternoon session we began work on a larger version of the
landscape, to build skills necessary when painting a larger
image . . . interrupted by a sudden thunderstorm, which ran
into all the north-facing windows, flooding the space with
water. |
 |
 |
 |
 |
|
Lee found
examples of pine trees, so David did a quick sketchbook
image of them |
The landscape
painting is nearly complete - now comes the 'special little
tweaks' |
David added sand
color (Permanent Rose, a touch of Indian Yellow, a touch of
Hookers Green to gray it down). Then he painted a graded
wash of Permanent Rose along the horizon line. |
David displays his final version of the landscape painting - while
class members take photos!
 |
 |
|
Everyone
(almost) takes a picture! |
David's final
class version - there will be even more tweaking later, I'm
sure! Maybe adding grasses in the foreground, even another
mountain |
Samples of student paintings
David's objective for the afternoon project was to stimulate our
understanding of pushing color on the paper, simplifying our
image,
and paint a larger image so that we could learn to use our whole
arm to paint long strokes. David encouraged us to 'paint a
feeling'.
He built a bead and carried it down the paper, changing colors at
the appropriate point. He worked both sides of the stream at
the same time, keeping his eye on the bottom edge of the bead.
Keep the bead moving, but not too quickly!
 |
 |
 |
|
David
demonstrates techniques needed to paint a larger image, and
to simplify it |
David explains
the order of paints applied - starting with the yellow sky
(Indian Yellow), Intense Blue hills watered down for a misty
blue effect, a layer of Permanent Rose at their base,
Hookers Green watered down, darker dirty green, followed by
darker and more earthy colors. |
The finished
sample - keep it simple. He said, "If you think you've
lost it, set it aside. Look at it. Ask, 'What
could I do with it?' Then, GO BOLD!" |
Samples of student paintings from the afternoon session
David presented a final demonstration, painting a Bul Bul bird
using the same kissed-edge blending throughout.
Now everyone wants a bird watercolor workshop next!
 |
 |
 |
 |
|
David begins
demo of painting a Bul Bul bird, using the same kissed-edge
blending throughout. |
He added water
with a clean brush to give a soft effect to the bird's
'head' feathers |
|
Building the
image |
 |
 |
 |
 |
| |
|
David used the
same technique we learned in the Trees workshop to paint the
branch |
Almost finished
- now to work on the eye |
 |
 |
|
Finished! . . .
in less than 45 minutes. Amazing... |
David shows us
how to paint the eye |
|
|
|